Windows Server Essentials wizard failing at 16%

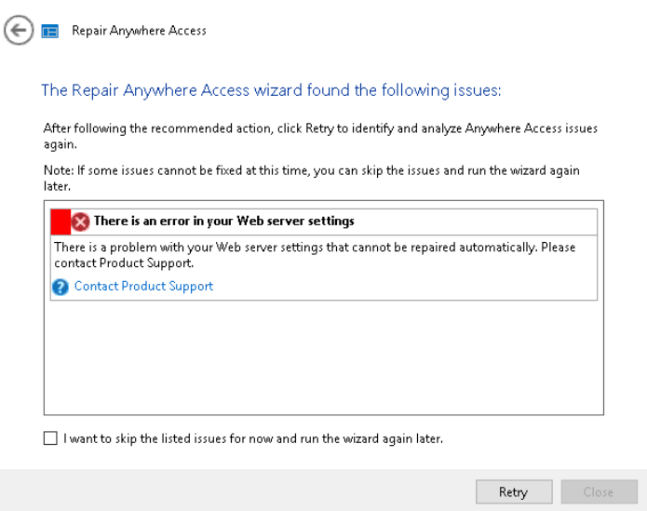
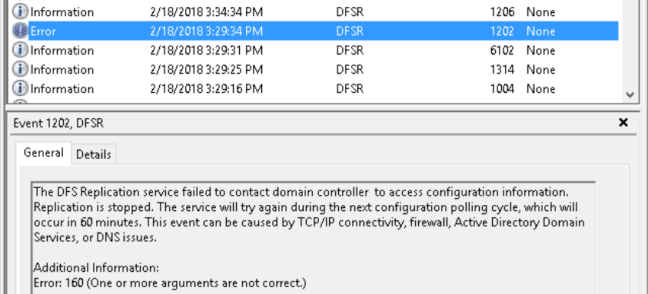
Good morning.  I wanted to document an issue I have seen several times.  The fix for this problem is pretty easy in PowerShell, but would take quite a bit of time using Server Manager.  The reason for the wizard is failing at 16% is due to the inability to connect to a domain controller in the domain.  This failure to connect is due to none of the roles being installed and therefore the server not being promoted to a domain controller.  This can all be discovered from the Essentials deployment logs in the C:\ProgramData\Microsoft\WindowsServer\Logs folder.

As I stated above the fix is pretty easy.  Run the three PowerShell commands below, changing domainname to the name you want for your domain and the P@ssW0rD! to a password of your choosing.  Keep in mind this password must meet complexity requirements with a length of at least 8 characters and 3 of 4 character types; capital letter, lowercase letter, number, special character.

NOTE: If you do not want the default computer name of WIN-<random string>, then you should change the computer name via the sysdm.cpl application or use netdom.
Also, change domainname.local to a domain name of your choice that ends in .local.  For instance tailspintoys.local or contoso.local.  You will not be able to change the computer or domain name after completing the wizard.

Install-WindowsFeature AD-Domain-Services,DNS,FileAndStorage-Services,File-Services,FS-FileServer,FS-BranchCache,FS-DFS-Namespace,Storage-Services,NPAS,RemoteAccess,DirectAccess-VPN,Remote-Desktop-Services,RDS-Gateway,Web-Server,Web-WebServer,Web-Common-Http,Web-Default-Doc,Web-Dir-Browsing,Web-Http-Errors,Web-Static-Content,Web-Http-Redirect,Web-Health,Web-Http-Logging,Web-Log-Libraries,Web-Request-Monitor,Web-Http-Tracing,Web-Performance,Web-Stat-Compression,Web-Security,Web-Filtering,Web-Basic-Auth,Web-Client-Auth,Web-IP-Security,Web-Windows-Auth,Web-App-Dev,Web-Net-Ext45,Web-ASP,Web-Asp-Net45,Web-ISAPI-Ext,Web-ISAPI-Filter,Web-Includes,Web-Mgmt-Tools,Web-Mgmt-Console,Web-Mgmt-Compat,Web-Metabase,Web-Scripting-Tools,ServerEssentialsRole,NET-Framework-45-Features,NET-Framework-45-Core,NET-Framework-45-ASPNET,NET-WCF-Services45,NET-WCF-HTTP-Activation45,NET-WCF-TCP-PortSharing45,BranchCache,GPMC,RSAT,RSAT-Role-Tools,RSAT-AD-Tools,RSAT-AD-PowerShell,RSAT-ADDS,RSAT-AD-AdminCenter,RSAT-ADDS-Tools,RSAT-ADCS,RSAT-ADCS-Mgmt,RSAT-DNS-Server,RSAT-NPAS,RSAT-RemoteAccess,RSAT-RemoteAccess-PowerShell,RPC-over-HTTP-Proxy,FS-SMB1,Windows-Defender-Features,Windows-Defender,Windows-Defender-Gui,Windows-Internal-Database,WAS,WAS-Process-Model,WAS-Config-APIs,Search-Service,Windows-Server-Backup,WoW64-Support

$Password = ConvertTo-SecureString “P@ssW0rD!” -AsPlainText -Force

Install-ADDSForest -DomainName “domainname.local” -SafeModeAdministratorPassword $Password -Force

After the above commands complete the server will automatically restart and the deployment wizard should complete without further errors.  If it is failed, then click Retry.  I have seen a few instances where a retry is necessary.

I hope you found this post helpful.  If you have anything to add, please do so in the comment section below.

Some settings in Windows 2016/10 giving an error

Good afternoon.  I ran into an interesting issue I figured I would share.  I had a customer that would receive the error below when clicking on some settings in Windows, for instance the change adapter options in the network section of settings.

user profile error

I did quite a bit of searching for a possible solution and I found quite a few forum posts and self-help guides, but none had the solution.  I broke out a tool I use from time to time to see I could figure out why Windows cannot access the device, path, or file; Process Monitor.  I ran a capture while duplicating the issue.  In pouring over the results I found a possible culprit in some registry paths in the HKCU registry hive.  It turns out that these setting options look at paths stored in the registry when clicked.  Unfortunately for my customer he was missing some paths and so Windows could not find the file.

To confirm this was the issue I created a copy of the administrator account and we logged on with that account.  Sure enough, no errors.

To fix the issue we simply deleted the user profile for the problem account.  This can be accessed by running sysdm.cpl, going to the Advanced tab and clicking user profiles Settings button.  After deleting the profile, we then logged the test account off and logged on with the administrator account and presto, no more errors.

I hope you found this article informative.  If you have anything to add or just want to comment, please do so below.

Performing a bare metal restore with Windows

Good morning.  I had a question today on what to do if the hard drives are not detected when performing a bare metal restore.  Loading the driver is pretty straightforward, but I could not find a good guide on the whole process, so I figured it was time to put one together.  Below I will outline with screenshots the process to do a bare metal restore.  The screenshots will be from Windows Server 2016, but the process is the same for all currently supported versions of Windows.

  1. We start by booting to the Windows media.  After selecting the language, you have two options; Install now or Repair your computer.  Choose Repair your computer.
    2
  2. The next screen may give you more or fewer options.  Choose Troubleshoot.
    3
  3. From the Advanced options screen, choose System Image Recovery.
    4
  4. If given the option for a target operating system, choose the one applicable to you.
    5
  5. On the following screen, you will have two options; Use the latest image or select a system image.  If you want to restore the latest backup, then you simply need to click next.  If however you want to restore an earlier backup, choose the option to select a system image.  This guide will continue with the second option.
    7
  6. If you have only one backup drive, then only one line item will show.  A line for each backup drive will be displayed on this screen.  Choose the backup drive to restore from and click Next.
    9
  7. On this screen all the available backups are displayed to restore from.  Select the preferred backup to restore and click Next.
    10
  8. This screen provides three important options.  The first is to format and repartition the disks.  Select this option to completely wipe the drive being restored to.  It is possible to exclude data drives from this by clicking the exclude drives button and checking the drive to exclude.  The second option will only restore the system drives.  Keep in mind though, if the page file was moved a data drive, that drive is now considered a system drive and has to be part of the restore.  The last option is to install drivers.  Do this if the drives being restored to are not detected by the restore wizard.  Once all desired options are selected, click Next.
    12
  9. This screen is a summary of the restore.  Click Finish to start the restore process.
    14

After clicking yes on the prompt, the rest of the process is automated.  The server will be restored and automatically boot back into the restored Windows OS.

I hope you found this post informative.  If you have anything to add or suggest, please do so in the comments below.

TPM 2.0 and Windows 2012R2

Good morning.  It has been some time since I last posted.  I had an interesting case though I figured I would share.  I had a customer that was attempting to enable BitLocker on his C: drive.  When running the wizard it would immediately fail with the message “An internal error was detected.”

Bitlocker Internal error

I had to do a bit of research as that error is a little vague.  I was able to get the error code associated with this error when running manage-bde command.  With the error 0x80290107 I was able to find a forum post that indicated the root issue.  BitLocker in Windows Server 2012 R2 does not support the SHA256 encryption algorithm.  After changing the bios setting to SHA1, BitLocker worked without issue.

So if you have Windows Server 2012 R2 with TPM 2.0 and you get the above error enabling BitLocker on the C:, verify that the TPM is set to use SHA1 encryption.

I hope you found this post informative.  If you have anything to add or just want to comment, please do so below.

failed to initialize

I ran into an issue that took me quite a bit of time to resolve that I wanted to share with everyone.  I had a customer that I worked with that was not able to start any VM (virtual machine)  across 3 Hyper-V servers he had deployed in his environment.  When attempting to start the virtual machine it would get to starting…4% and then give a pop-up error message “<VM Name> failed to initialize”.  My first stop was the Hyper-V VMMS log which contained the same error.  I eventually checked the application log and found this event:

Event ID 1000, Application Crash
Faulting application name: vmwp.exe, version: 6.3.9600.18895, time stamp: 0x5a4b1c19
Faulting module name: KERNELBASE.dll, version: 6.3.9600.18895, time stamp: 0x5a4b1cf7
Exception code: 0xe06d7363

Faulting application path: C:\Windows\System32\vmwp.exe
Faulting module path: C:\Windows\system32\KERNELBASE.dll

This led me to a topic referring to an issue with January 2018 windows updates.  You can find that article here.  I uninstalled all updates in January and February on the first server, but this made no difference.  The solution was to change 2 registry keys:

HKEY_LOCAL_MACHINE\SYSTEM\CurrentControlSet\Control\Session Manager\Memory Management\FeatureSettingsOverride
HKLM\SOFTWARE\Microsoft\Windows NT\CurrentVersion\Virtualization\MinVmVersionForCpuBasedMitigations

Before running the below commands, the values were 3 and 1 respectively.

reg add “HKEY_LOCAL_MACHINE\SYSTEM\CurrentControlSet\Control\Session Manager\Memory Management” /v FeatureSettingsOverride /t REG_DWORD /d 0 /f
reg add “HKLM\SOFTWARE\Microsoft\Windows NT\CurrentVersion\Virtualization” /v MinVmVersionForCpuBasedMitigations /t REG_SZ /d “1.0” /f

I hope you have found this article informative.  If you have anything to add or just want to comment, please do so below.

Error 1202 from DFSR

I ran across an interesting issue I wanted to share.  I had a customer that recently had a migration performed.  Previously he was running SBS (Small Business Server) 2011 and is now running Windows Server Essentials 2016.  After demoting and removing the SBS 2011 server, he started receiving the following error on every boot.

1202 DFSR

The error is quickly followed by an informational message indicating that DFSR (Domain File System Replication) successfully connected to a domain controller.

Based on my previous experience with similar issues I posited that the problem was due to the DFSR service starting before either the network stack was fully initialized or before the DNS (Domain Name System) service was running.

I explained that based on the behavior this could safely be ignored.  This did not go over very well as the error also shows up in the Windows Essentials health report.  This brings us to the solution.  And this solution will work for just about any service that needs a little more time at boot.  We set the startup type for the DFSR service to Automatic (Delayed Start).  We restarted the server and this eliminated the 1202 error.

I hope that you found this article informative.  If you have anything to add, please feel free to leave a comment below.

The diskshadow command, a hidden gem

Good morning.  In case you haven’t guessed it already I typically write these posts in the morning.  As I write this now it is 6:30AM.  Today I wanted to share a command line utility I just recently discovered.  It has been part of Windows for quite some time though.  At least since Windows Server 2008.  The utility is called diskshadow.  This utility allows direct interaction with VSS (Volume Shadow Copy Service).  You can find the Microsoft technet article here.  In this article I will go over how I used it to troubleshoot a recent issue with VSS.

I was recently troubleshooting a VSS where the snapshot was failing on release.  As is typical, my customer was using a 3rd party backup software.  I wanted to test outside of the backup software, so we installed the Windows Server Backup feature and tried that.  Unfortunately the symptoms were identical.  After quite a bit of digging I ran across the diskshadow utility.  With that utility I received a different error which led me down the path of discovering the problem.  It turned out that the backup software’s filter driver was stepping on VSS and causing the failure.  After removing the backup software, VSS worked without issue.

So how is the diskshadow command used?  It can be used to create a snapshot, mount an existing snapshot, restore a snapshot and several other things.  Below I will cover the commands to take a VSS snapshot, as that is the functionality I find most useful.  To take a snapshot of the C: drive and test the majority of the VSS writers there are just 3 commands that need to be run.

  1. diskshadow (This starts the command and puts you at a diskshadow prompt.  This is similar to ntdsutil and nslookup.)
  2. add volume c: (This adds the C: drive to the snapshot.  You could substitute another drive letter if you want to test a specific writer.  The command can also be repeated with other drive letters to include them in the snapshot.)
  3. create (This starts the snapshot process with VSS.  It is important to note that the create command by itself will create a non-persistent snapshot.  That is the snapshot will be removed on exit from the diskshadow utility.  A persistent snapshot can be created with additional parameters.)

This utility is considerably faster when troubleshooting VSS, taking only about 1-2 minutes to take a snapshot or fail.  It also removes the requirement for a USB drive to temporarily store a backup.  For these reasons I will be using whenever troubleshooting VSS in the future.

I hope you found this article informative.  If you have anything to add or just want to leave a comment, please do so below.


The Network Location Awareness service

Good morning.  I wanted to share an issue I see on a regular basis.  This has to do with the NLA (Network Location Awareness) service.  For those that are not aware of this service it is responsible for determining the type and safety of the network(s) the computer is connected to.  There are 3 network classifications that are used.

  • Public – The NLA determines the computer is directly connected to the Internet or is on an unsafe network.  This is also the default profile assigned to a network adapter until one of the other profiles can be determined.
  • Private – The NLA determines the computer is isolated from the Internet by a NAT (Network Address Translation) device or router.
  • Domain – The NLA determines that the computer is connected to a domain.  It does this by attempting to contact a domain controller.  More specifically it performs a DNS (Domain Name System) query for a SRV (Service) record.  It will then make a connection to the domain controller.  If this is all successful, the domain profile is set.

So what is the purpose of the NLA and setting a network profile?  The primary purpose is for the Windows firewall.  Other applications and services can also access this data though.

Now that the NLA service is sufficiently explained, on to the common issue with it.  The NLA service by default is set to Automatic for its startup type.  Normally this works fine and the NLA properly detects the network.  There are some situations though where the service fails to set the profile correctly on startup.  I typically see this on domain controllers in a domain with just one domain controller.  This means that the network stack and DNS server service have to fully initialize and start before the NLA queries the network.  If they do not then the NLA is not able to contact a domain controller and assumes the computer is connected to a private or public network.

Regardless of the reason why the NLA is failing at startup the solution is fairly simple.  I have seen a 100% fix rate with simply setting the service startup type to Automatic (Delayed Start).  Doing this forces the NLA service to wait until all Automatic services have started, giving DNS enough time to start.  I have seen this little trick work with other services when they are having trouble at startup.

I hope you found this article informative.  If I missed anything or you just want to comment, please feel free to do so below.

How to re-deploy VPN in 2016 Essentials in legacy mode.

This is the third article in a series of articles covering VPN in Windows Essentials.  In the first article I covered an issue with VPN and DHCP.  In the second article I covered how to re-deploy VPN with PowerShell in 2016 Essentials.  In this article I will cover how to re-deploy VPN in legacy mode.

  1. First we must clear the configuration. Launch a PowerShell session as administrator.
  2. Run Uninstall-RemoteAccess.  Hit enter when prompted.
  3. Install the RRAS (Routing and Remote Access Service) console by running the following command: Install-WindowsFeature RSAT-RemoteAccess-Mgmt
  4. Run rrasmgmt.msc to launch the RRAS console.
  5. Right-click on the server name and choose “Configure and Enable Routing and Remote Access”
    RRAS 1
  6. Click Next.
  7. Ensure the Custom configuration radio button is selected and click Next.
    RRAS 2
  8. Check the box for VPN and click Next.
    RRAS 3
  9. Click Finish to complete the initial configuration.  You will get a popup indicating a policy was created.  Click OK to continue.
    RRAS 4
  10. When prompted to start the service, click Start service.
  11. RRAS is now running, but there are two more required steps to complete the configuration.  Right-click the server name and choose Properties.
    RRAS 5
  12. Click on the Security tab.  At the bottom of the screen, choose the correct certificate and click Apply.  Click Yes to restart RRAS.
    RRAS certificate
  13. Click the IPv4 tab.  Click the radio button for Static address pool and click the Add button.  Fill in the start IP address and end IP address and click OK twice.
    RRAS static pool
  14. Restart the RRAS service.

At this point RRAS should be configured properly.  Optionally you can disable the unused protocols in RRAS.  To do so right-click on Ports and click Properties.
RRAS ports

Only SSTP is used in Essentials by default, so the other protocols can be removed/minimized.  Highlight IKEv2 and click Configure.  Change the maximum ports to 0 (zero) and click OK.  Click Yes on the popup.  Repeat this with L2TP and GRE.  For PPTP you cannot reduce to zero, but you can reduce to 1 (one).  I also like to reduce the number of ports to match the number of IP addresses in the static pool.  This is to ensure that all connections get a valid IP address.  So I limited the ports to 20 for SSTP.  When complete it should look something like below.
RRAS ports limited

I hope you found this article informative.  If you have anything to add or just want to comment, please do so below.

How to re-deploy VPN in 2016 Essentials with PowerShell

In my previous article I discussed an issue I see commonly with VPN in Essentials.  In that article I gave the fix for all versions of Essentials except 2016.  In this article I will cover the fix for 2016 Essentials.

As stated previously, 2016 Essentials uses PowerShell to configure the VPN.  Here is what the default configuration looks like:

RemoteAccess Default

If you try to manage it in the RRAS (Routing and Remote Access Server) console, you will see this:

legacy mode

The message would imply that you could turn on legacy mode.   This is true, but to turn on legacy mode requires clearing the configuration from RRAS.  Clearing the configuration must be done with PowerShell.  Re-deploying the VPN can be done with both PowerShell and the RRAS console.  Below are the PowerShell commands.

  1. Launch a PowerShell session as administrator.
  2. Run Uninstall-RemoteAccess.  Hit enter when prompted
  3. Run Install-RemoteAccess -VpnType Vpn -IPAddressRange 192.168.16.100,192.168.16.120
    Change the ip addresses to match the range you want to use.  In the command above the start IP address is 192.168.16.100 and the end IP is 192.168.16.120.
  4. It may be necessary to modify the SSL certificate.  To check this run Get-RemoteAccess.  If the SSL certificate matches the one installed by the Essentials anywhere wizard, then you are done.  If not, please proceed to the next step.
  5. Run Set-Location Cert:\LocalMachine\My; Get-ChildItem | Subject,Thumbprint
    You should see output similar to the following:
    certificate 1
  6. Make note of the Thumbprint for the certificate that was created in the anywhere access wizard.
  7. Next assign the certificate to the VPN with the following command:
    Get-ChildItem | ? Thumbprint -eq “C39ED8D5ADC2F73A05A909BE9C4692B43B963FB2” | Set-RemoteAccess
  8. Finally verify the correct certificate is assigned to the VPN with the command:
    Get-RemoteAccess
    RemoteAccess fixed

Clients should be able to connect and access resources via the VPN now.

I hope you found this article informative.  If you have any suggestions or comments please leave them below.