Problems installing RDS CALs on a 2019 license server

Good morning.  I had an interesting issue this morning I figured I would share.  I had a customer that was having a tough time installing his RDS CALs.  At both activate.microsoft.com and in the install license wizard we were receiving the error “Invalid license code” and “The serial number is not valid.” respectively.  I assumed this was due to a bad license code, as I have seen that a couple of times in the past.  After emailing Microsoft, I was able to confirm the license code was good. 

The serial number is not valid.

After going back to my customer, I found out that the license server was running Windows 2019.  Normally this should not be a problem as you can install down-level CALs.  For instance, it is possible to install 2012 RDS CALs on a 2016 license server.  It appears that may no longer be the case with 2019 or this may be a bug.  Time will tell.  In the end we fixed the problem by installing licensing on the Windows 2016 server.  The CALs then installed without issue.

If this changes in the future I will update this blog post.  I hope you found this blog post useful.  If you have any corrections or anything to add, please do so in the comments below.

Remove a Remote Desktop Server from a deployment.

Good afternoon all.  I figured I would take a few minutes for a quick RDS (Remote Desktop Services) tip.  There are some instances where it may be necessary to remove a role from a RDS server or remove a whole server.  You might think this is as easy as just removing the installed role(s).  There is one additional step though if you want the server to be removed from the list of Deployment Servers.

rds-remove-server

To remove a role from a server do the following:
1. Launch a PowerShell window as administrator
2. Run: Remove-RDServer -Server “RDS.mydomain.com” -Role “RDS-Licensing”
3. Run: Remove-WindowsFeature RDS-Licensing

The above example will remove the RDS licensing role from the deployment and the role from the server.  The command can be changed to remove other role services.  You can run Get-Help Remove-RDServer for full details or go here.

Using PowerShell to create a self signed certificate for longer than 1 year

Good morning.  It has been quite some time since I last posted.  I ran across this little gem this morning and figured I would share.

So you want to use a self-signed certificate for (RDS) Remote Desktop Services or maybe a custom website, but you want the certificate to be valid for longer than a year.  You can now use PowerShell to create a certificate for as long as you like.  Before we get into how to do this, let me emphasize this is not recommended by Microsoft.  It is much preferred to use a 3rd party trusted certificate.  Also the below command will only work in Windows Server 2016/Windows 10 and higher.

To create a self-signed certificate for a web server that is valid for 5 years:
New-SelfSignedCertificate -Subject “RDS.Contoso.local” -DnsName “RDS.Contoso.com”, “www.contoso.com” -CertStoreLocation “cert:\LocalMachine\My” -KeyAlgorithm RSA -KeyLength 2048 -KeyExportPolicy Exportable -NotAfter (Get-Date).AddYears(5)

Fixing RDS when it has been improperly deployed

In the last few articles I walked you through setting up RDS (Remote Desktop Services) in a domain, or a workgroup, and installing and activating CALs.  Today I wanted to touch on how to fix RDS when it has been improperly deployed.  The good news, it is typically very easy.

Typically when RDS is deployed improperly the user has installed the Session Host manually via the add roles wizard.  While this is fine in a workgroup, it does not work properly in a domain environment.  If this is the case, just running the Remote Desktop Services installation wizard is typically enough to fix the deployment.  Just follow this guide.  I have had about 90% success rate with this.

But what if the Remote Desktop Services installation wizard fails or does not complete? Don’t fret.  More than likely the issue can still be resolved without removing the roles.  Below are the two most common issues that I have run into when fixing an RDS deployment.

  1. The Remote Desktop Services installation wizard fails to create the Session Collection and remote apps.  Usually when this happens it is because the user has attempted to fix the installation with Group Policy.  There are two legacy group policy settings  for specifying the license server and license mode.  These settings  are not supported in 2012, do not work, and will cause the Session Collection wizard to fail.  The fix is simple, remove the group polices.  Set them to Not configured.  Here is a screen shot of what the policies should look like and their location.RDS GPO
    Computer Configuration -> Administrative Templates -> Windows Components -> Remote Desktop Services -> Remote Desktop Session Host -> Licensing
  2. The Connection Broker role service role fails to deploy and the Remote Desktop Services installation wizard indicates the server requires a restart.  Rebooting the server and running the wizard will again indicate a reboot is required.
    The first time I ran into the this issue it took me a bit of time to track it down.  After rebooting the server and checking for the file C:\windows\winsxs\pending.xml, and not finding it.  Additionally, checking the c:\windows\log\cbs\cbs.log and seeing that a reboot is not pending, I was confused.  I then dug deeper into the cbs log and found that the installation was being rolled back and that roll back required a restart.  So why was the install failing?  The key is an error logged in the system log during the install.

    Log Name:      System Source:
    Service Control Manager
    Event ID:      7041
    Level:         Error
    Description: The MSSQL$MICROSOFT##WID service was unable to log on as NT SERVICE\MSSQL$MICROSOFT##WID with the currently configured password due to the following error:  Logon failure: the user has not been granted the requested logon type at this computer.

    Service: MSSQL$MICROSOFT##WID  Domain and account: NT SERVICE\MSSQL$MICROSOFT##WID

    This service account does not have the required user right “Log on as a service.

    The Connection Broker service requires a SQL database to store its data.  By default it uses the WID (Windows Internal Database).  Because the WID cannot start, the Connection Broker role service install fails and the install has to be rolled back.  This typically only occurs when the RDS server is also a domain controller.  It is possible though on a member server if security has been tightened.  The fix is fairly easy and is documented in Microsoft KB 2832204.   Because this typically occurs on a domain controller though, you cannot simply edit the local group policy or the local security policy.  You must create a new GPO (Group Policy Object) and link it to the domain controllers container.  Here is the process.

    1. On a domain controller, launch the group policy management console.  (gpmc.msc)
    2. Expand Forest, Domains, your domain name, then Domain Controllers.
    3. Right-click on the Domain Controllers container and choose Create a GPO in this domain and Link it here.
    4. Give the GPO a descriptive name like “Allow WID logon on DC” and click OK.
    5. Right click the new GPO and choose Edit.
    6. Navigate to the following location: Computer Configuration -> Policies -> Windows Settings -> Security Settings -> Local Policies -> User Rights Assignment
      WID GPO
    7. Right-click on Log on as a service and choose Properties.
    8. Check the box to Define these policy settings.
    9. Click on Add User or Group and add the following user: NT SERVICE\ALL SERVICES
    10. Click OK and close the Group Policy Management Editor window.
    11. To make the setting take effect immediately, run gpupdate /force at an administrative command prompt.

If the above solutions did not resolve the deployment issues with RDS, there is another option.  If all else fails, remove all RDS role features* and start the deployment over again.  As bad as this sounds it typically only takes 30-60 minutes to remove the roles and redeploy correctly.

If I missed anything, please submit a comment below.  Thanks for reading.

* If Licensing has been configured and RDS CALs (Client Access Licenses) added, it is typically best to not remove the licensing role feature.  That is unless you enjoy calling the Microsoft clearinghouse. 🙂

How to properly deploy Remote Desktop Services in a workgroup

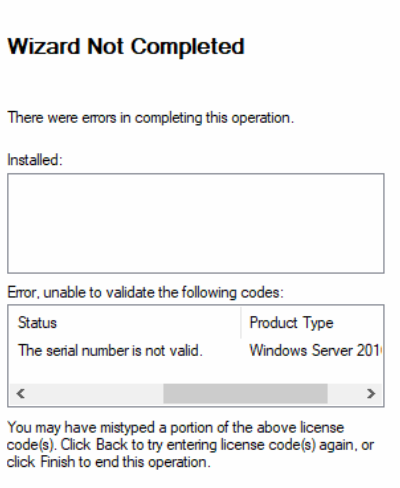
I have previously written an article on setting up RDS (Remote Desktop Services) in domain environment.  However, what if there is only one server and/or there is no domain?  It is still possible to setup RDS, but the process is a little different.  Connection broker, a component of RDS, does not work properly in a workgroup environment.  Also it is not possible to use Remote App, another component of RDS, or create a session collection.  Without a session collection, Session Host, yet another RDS component, will not be able to obtain licenses. Without licenses RDS will cease to function after the initial grace period.  Typically this is 120 days. We get around this by manually editing the WMI attributes for Session Host.

Here is how to properly deploy RDS in a workgroup.  I am going to use PowerShell to make this quick and easy.  This guide is applicable for Windows 2012, 2012R2 and 2016 in a single server workgroup environment.  If you have Windows Server 2019 or higher the process has changed.  Skip to the bottom for that process.

  1. Launch a Windows PowerShell using the Run as Administrator option.
  2. Run the following command to install the RDS components that are required. (This will automatically restart the server)
    Install-WindowsFeature RDS-RD-Server,RDS-Licensing -IncludeManagementTools -Restart
  3. After the server restarts, log back in.
  4.  Launch a Windows PowerShell using the Run as Administrator option.
  5. Run the following commands to manually configure Session Host*.
    • $obj = gwmi -namespace “Root/CIMV2/TerminalServices” Win32_TerminalServiceSetting
    • $obj.ChangeMode(2)
    • $obj.SetSpecifiedLicenseServerList($env:computername)

The next step is to activate the RDS license server and install RDS CALs.  You can find an article on how to do that here.

* On the $obj.ChangeMode() command:
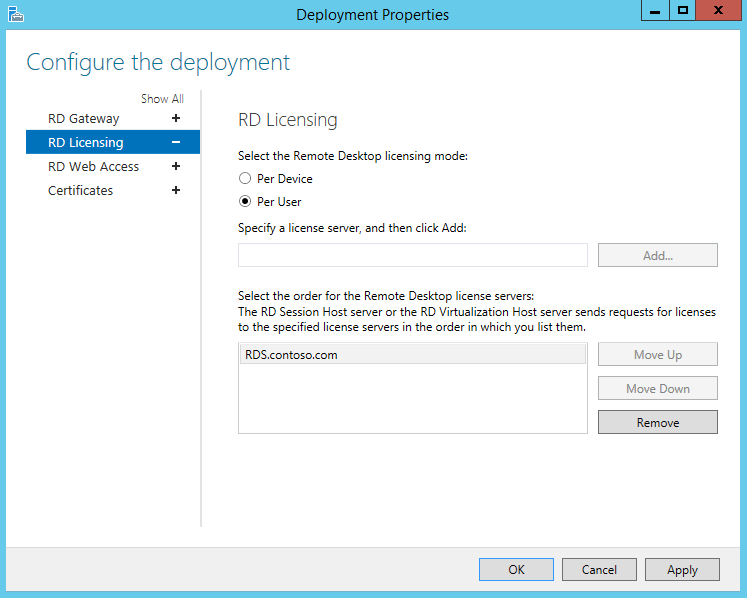
$obj.ChangeMode(4) = Per User licensing
$obj.ChangeMode(2) = Per Device licensing (supported mode for workgroups)

An update to this article.  It appears in Windows Server 2016 and 2019 Microsoft is enforcing Per Device mode in a workgroup configuration.  So if you install RDS in a workgroup in 2016 or 2019, you should use Per Device mode.  This is not usually an issue as RDS CALs can be converted between Per User and Per Device in the licensing manager.

Another update, July 2021.   Microsoft has changed the process for Windows Server 2019.  The above PowerShell script will fail to set the mode.  To properly do this the registry needs to be edited.

  1. Open Registry editor (Right-click Windows logo at the bottom left and choose Run.  Type regedit and hit enter.)
  2. Navigate to:
    HKEY_LOCAL_MACHINE\SYSTEM\CurrentControlSet\Control\Terminal Server\RCM\Licensing Core
  3. Verify there is a DWORD for “LicensingMode” and it is set to 2.  If not present, right-click and choose New-> DWORD (32-bit) Value.  This must be set to 2 for “Per Device”
  4. Navigate to:
    HKEY_LOCAL_MACHINE\SYSTEM\CurrentControlSet\Services\TermService\Parameters\LicenseServers
  5. Verify there is a Multi-String for “SpecifiedLicenseServers” and it is set to the server’s name.  If not preset, right-click and choose New->Multi-String Value.  
  6. Reboot the server.

How to properly deploy Remote Desktop Services on a single domain joined server

I have seen so many deployments of RDS (Remote Desktop Services) done incorrectly in Windows Server 2012/2012R2 that I wanted to get the correct process out there.  Unlike previous versions of Windows, RDS in 2012 must be deployed with the RDS installation wizard.  There is one exception to this rule.  When there is only one server and it is in a workgroup, the deployment works differently.  I will cover that deployment in another guide.

This guide is applicable for a Windows 2012/2012R2 server that is joined to a domain or is a domain controller.  Following the below steps will take you through the setup of the first RDS server.

  1. Join the server to the domain.  If the server is also to be the domain controller*, install the ADDS (Active Directory Domain Services) role and promote the server.
  2. Launch the Add Roles and Features Wizard in Server Manager.
    1. Launch Server Manager
    2. At the top right, click Manage
    3. Choose Add Roles and Features
  3. On the Installation Type screen, choose Remote Desktop Services installation and click Next.
    installation type
  4. On the Deployment Type screen, choose Quick Start and click Next.
    quick start
  5. On the Deployment Scenario screen, choose Session-based desktop deployment and click Next
    session based
  6. On the Server Selection screen, verify the server is selected and click Next.
    server selection
  7. On the Confirmation screen, check the box to Restart the destination server automatically if required and click Deploy.  The server will automatically reboot.
    confirm
  8. Log into the server after the reboot.  The wizard will automatically launch and the deployment should complete.  Close the wizard when complete.
    completed
  9. Go back to Server Manager.  On the left side click on Remote Desktop Services.  You should see a screen similar to the following.
    RDS console.PNG
  10. Click the + symbol above RD Licensing.  This will launch the wizard to add a licensing server.
  11. Add the server to the Selected list and click Next.
    License server add
  12. Click Add.  When the process completes, click Close
  13. Click the TASKS button next to DEPLOYMENT OVERVIEW  and choose the option to Edit Deployment Properties.
    edit deployment properties
  14. Click the RD Licensing option on the left side.  Choose the licensing mode that matches the RDS CALs purchased.  The licensing server should already be populated.  If it is not type in the FQDN (Fully Qualified Domain Name) and click Add.  Click OK.
    config license mode


You now have a very basic setup of Remote Desktop Services.  The next step is to activate your license server and install your RDS CALs.  I will write an article on that process in the near future and update this article once it is published.


*Microsoft discourages making an RDS server a domain controller.  If it is required, see this technet article.